Getting Windows Shell Extensions to work with DiscountASP.NET’s Hosted Team Foundation Server 2010

There have been a few support requests regarding the Windows Shell Extensions feature that’s included with the Team Foundation Server Power Tools and I have had an opportunity to sit down with it and get it to work with the DiscountASP.NET Team Foundation Server 2010 hosting service.

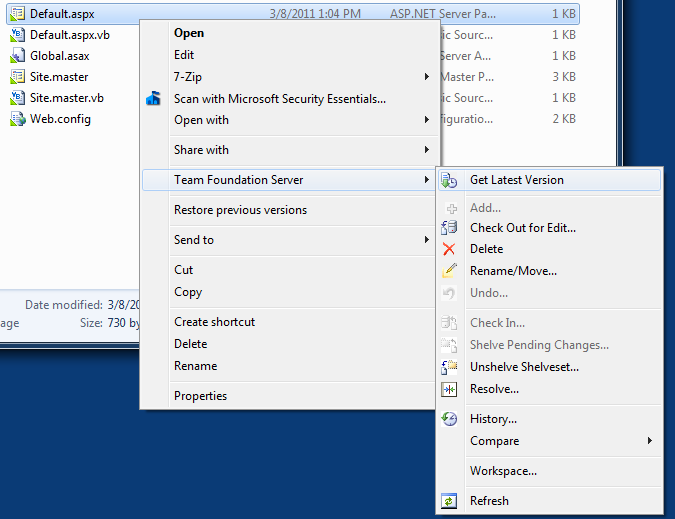
The Windows Shell Extensions allows you to perform some of the most frequently used operations such as getting the latest version of a file, checking in your changes, checking out a file for editing, viewing the changesets and also file comparing directly from Windows Explorer without launching Visual Studio. It integrates well and here’s a screen capture of what the context menu looks like:

Before installing the Team Foundation Server Power Tools, you’ll need to make sure that you have installed Visual Studio 2010 or Visual Studio Team Explorer 2010 installed and then perform the following steps:

  1. Download the most current release of Team Foundation Server Power Tools.
  2. You can select the typical option during the installation process or use the custom installation to also install the additional components.
  3. Depending upon which features you installed, you may be prompted to restart your workstation.
  4. To avoid any problems, I would recommend saving your credentials to the TFS server through Windows. If you need help saving your server information and username and password combination, take a moment to review the “Stop asking me for my !@#$% password!” post.

I had some problems trying to use the Windows Shell Extensions after installation since it seemed that I was disconnected from the server so if you experience this problem as well, just launch Visual Studio, connect to your server and then close Visual Studio.

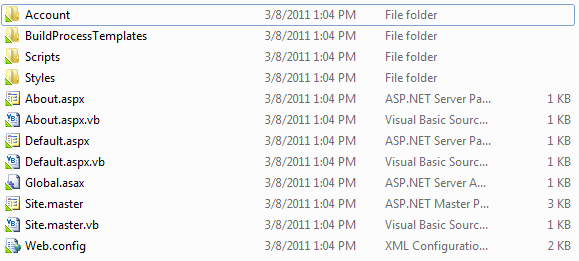
You can verify the installation by checking any folder that you have mapped as a workspace and you’ll see a green tab in the lower-left corner of the file icon:

LizaMoon mass SQL injection continues to spread

A new large-scale SQL injection exploit has been making the rounds for the past few days, and we are starting to see it show up on a small number of customer sites.

If a site visitor has complained that they received a security warning when visiting your site, you may have been affected by the LizaMoon SQL injection. This websense article goes into the details of the exploit.

Has your site been compromised?

The LizaMoon SQL injection inserts the following line into the code on a page (or pages) of your site:


Note that the domain name may be different, but the URL will always point to the ur.php file. You can search your site files and database for ur.php to see if you are affected by this exploit.

You can also check Google’s Safe Browsing advisory to see if any problems have been detected with your site:

http://google.com/safebrowsing/diagnostic?site=YourHostedDomainName.com

It is not yet known which application or applications are being targeted by the current exploit, so if you use any third party applications you may want to confirm with the application’s authors that they are not vulnerable to SQL injection.

What the hell is SQL injection anyway?

In a nutshell, SQL injection is a method used to run queries on a site’s database through an insecure web application. Any web application that accepts user input is susceptible to SQL injection if that user input is not “sanitized,” or filtered to remove certain characters. If you do not sanitize or check user input, SQL commands can be run by entering malicious data into a user input field and sending it to the database.

It’s important to stress that SQL injection does not exploit a vulnerability in the SQL server itself, but rather in a web application.

Sanitizing user input will protect you from any SQL injection, so it’s definitely worth double checking your own code, and pestering the authors of third party code to let them know that security is important to you.

Does Team Explorer Everywhere 2010 work with DiscountASP.NET Team Foundation Server 2010?

In the past 13 years of working with Microsoft products, one of the embedded conceptions is that their applications, servers and other services don’t play well with others and based upon their history, perhaps it’s justified.

What’s interesting though is the change of conception with the Team Server Foundation 2010 service that we offer.
It would be natural to think that since Team Foundation Server 2010 would work well with their Visual Studio authoring platform and there’s very easy integration there but as we mentioned in our Using Team Foundation Server 2010 Source Control from SQL Server Management Studio post, there is a lot of extensibility and as surprising as it may seem, there’s even an effort to bridge cross-platform development that might occur during process development through Team Explorer Everywhere 2010 since one of the ideas that we’re being taught is that ideally, Team Foundation Server 2010 is meant to serve as a generic, collaborative source control solution.

Team Explorer Everywhere works with our service through a plug-in that Microsoft released for Eclipse which has been around for quite some time.

Eclipse is Java-based so if you intend to access the DiscountASP.NET Team Foundation Server 2010 service, you’ll need to make sure that you have a copy of the Java Runtime Environment available on your workstation. You can find the supported versions under the System Requirements section on the Team Explorer Everywhere 2010 download page and you can use the links below as a quick reference:

After you’ve installed the Java Runtime Environment, head over to the Eclipse web site and download Eclipse Classic. From what I’ve reviewed, you can also just install the Eclipse Platform Runtime but it’s not something that I was able to test directly for this review.

Once the Eclipse installation has completed, go to the Visual Studio Team Explorer Everywhere 2010 download page to obtain the 90-day trial version and download all three of the available files which are:

  • InstallTEE.htm
  • TEE-CLC-10.0.0.zip
  • TFSEclipsePlugin-UpdateSiteArchive-10.0.0.zip

The file that you’ll want to open first is the InstallTEE.htm which has the plug-in installation instructions for the supported platforms.

The configuration process is very simple and when it’s time to connect to your DiscountASP.NET Team Foundation Server 2010 system, use the server information available on the Account Information page and connect as a user that you created through the Manage Users utility.

If you’re looking for more documentation, Microsoft recently updated their Help Center. Of course, you’re welcome to or if you have any other questions, post in the DiscountASP.NET Community Forum.

Let’s hope that the direction that Microsoft is taking with Team Foundation Server 2010 continues!

Urban Turtle Partnership for Hosted and On-Premises Agile Project Management

hosted urban turtle and hosted tfsWe are happy to announce a partnership with Urban Turtle, a leading agile project management solution developed by Pyxis Technologies.

Under this partnership, DiscountASP.NET introduces a hosted Urban Turtle solution which is available to our TFS hosting customers as an add-on. With drag and drop capabilities, the Urban Turtle solution will help teams organize, plan and track their software development projects much easier.

We also worked out a deal for DiscountASP.NET customers – customers can get a 10% discount on the purchase of Urban Turtle solutions for on-premises use. The offer information can be found in a new Marketplace section of the TFS Control Panel.

Takeshi Eto
VP Marketing and Business Development

Installing GleamTech File Vista on a shared hosting account

Most of our customers use FTP or Microsoft Web Deploy to upload their local application to their hosting space.  In some situations, you may not be able to access your site using these methods, for instance if there are network restrictions in your workplace.

In this article, I am going to show you how to install a simple .NET file manager, FileVista, on your site.  You can use this tool to upload/download files on your site.

1.    Download FileVista from Gleamtech.  The single user license is free.
2.    On the download page, make sure you select the “Web Deploy Package.”
3.    Once you download the zip file, extract it to a temporary location on your computer.
4.    Within the extracted directory, you should see a directory named FileVista.
5.    Upload the contents to a subdirectory of your site.
6.    Once the upload process is completed, log in to Control Panel and go to the Web Application Tool.
7.    In the Web Application Tool, select the directory where you uploaded FileVista, and click Install Application.

8.    Now, navigate to the location where you installed FileVista, in this case, /filevista.  You should see the welcome wizard:

9.    Click Next.  On the next screen, you can choose whether you want to use a file based database or SQL server.  I highly recommend using the file based database unless you intended to have many users.

10.    Click Next.  You should see a Pop up displaying the preinstallation test result.  Click OK.
11.    On the next page, you’ll configure the following:

a.    Set the administrator username and password.
b.    Set the default language.
c.    Set the Root Folder.  The root folder is where the file manager will point when you log in.  If you intend to use this tool to manage your site, set the root folder to: /

12.    Click Next and you are done.  You’ll be taken to the login screen.
13.    Log in with the username/password you specified during installation.
14.    You should now see a pop-up asking if you want to use the free version or a commercial version.  Select the free license mode unless you have purchased the product.

Research Paper: Does your smartphone say something about you?

Last year in our research we ran accross a study on comparison of different smartphone users and their credit card spending habits. We thought it would be interesting to explore different aspects of our customer’s behavior based on their smartphone preference. Here is the result of our exploration.

Summary
With the increasing global adoption of smartphones and the rapidly growing popularity of the mobile tablet, it is becoming increasingly important to understand the user behavior of people who use different mobile operating systems and form factors. However, there is a general lack of research data regarding the differences in user behavior between different mobile operating system users within a defined group of people. In this research paper, based on the results of a September 2010 survey of DiscountASP.NET customers, we explore user behavior differences among .NET web developers based on the smartphone they use, in terms of their mobile technology and mobile application consumption behavior.

Here’s the link to the research paper:

.NET Web Developer’s Smartphone Preference and What it says about their Mobile Technology and Mobile Application Consumption Behavior
Exploring Apple iPhone, RIM BlackBerry, Google Android, and Windows Mobile User Behavior

[PDF Version of the paper]

Takeshi Eto
VP Marketing and Business Development

Stop asking me for my !@#$% password!

If you’ve been using the DiscountASP.NET Team Foundation Server 2010 service for some time, one of the major annoyances is that you are unable to save your sign-in credentials when you connect to the server through Visual Studio. Unfortunately, it’s not a change that we can make since it’s a limitation of Team Foundation Server itself. But there is a workaround that you may want to consider.

You can store the server name as well as your user name and password combination in Windows.

To save your credentials, follow the steps for your version of Windows.

Windows 7

  1. Open the Windows Control Panel.
  2. Access User Accounts and Family Safety.
  3. Click on the Credential Manager.
  4. Then access the Add a Windows credential option.

Windows Vista

  1. Open the Windows Control Panel.
  2. Access User Accounts.
  3. Click on the “Manage your network passwords” under the Tasks menu on the left-hand side.

If you run into any problems on Vista, make sure that you specify that the credential type is for a Windows server.

Windows XP

  1. Open the Windows Control Panel.
  2. Double-click User Accounts.
  3. Click on the user that you’re signed in under “or pick an account to change.”
  4. Under “Related Tasks” click on the “Manage my network passwords” option to add your user.

If you are logged into a domain, you will need to supply the user name as \COLLECTION_username with a leading backslash character.