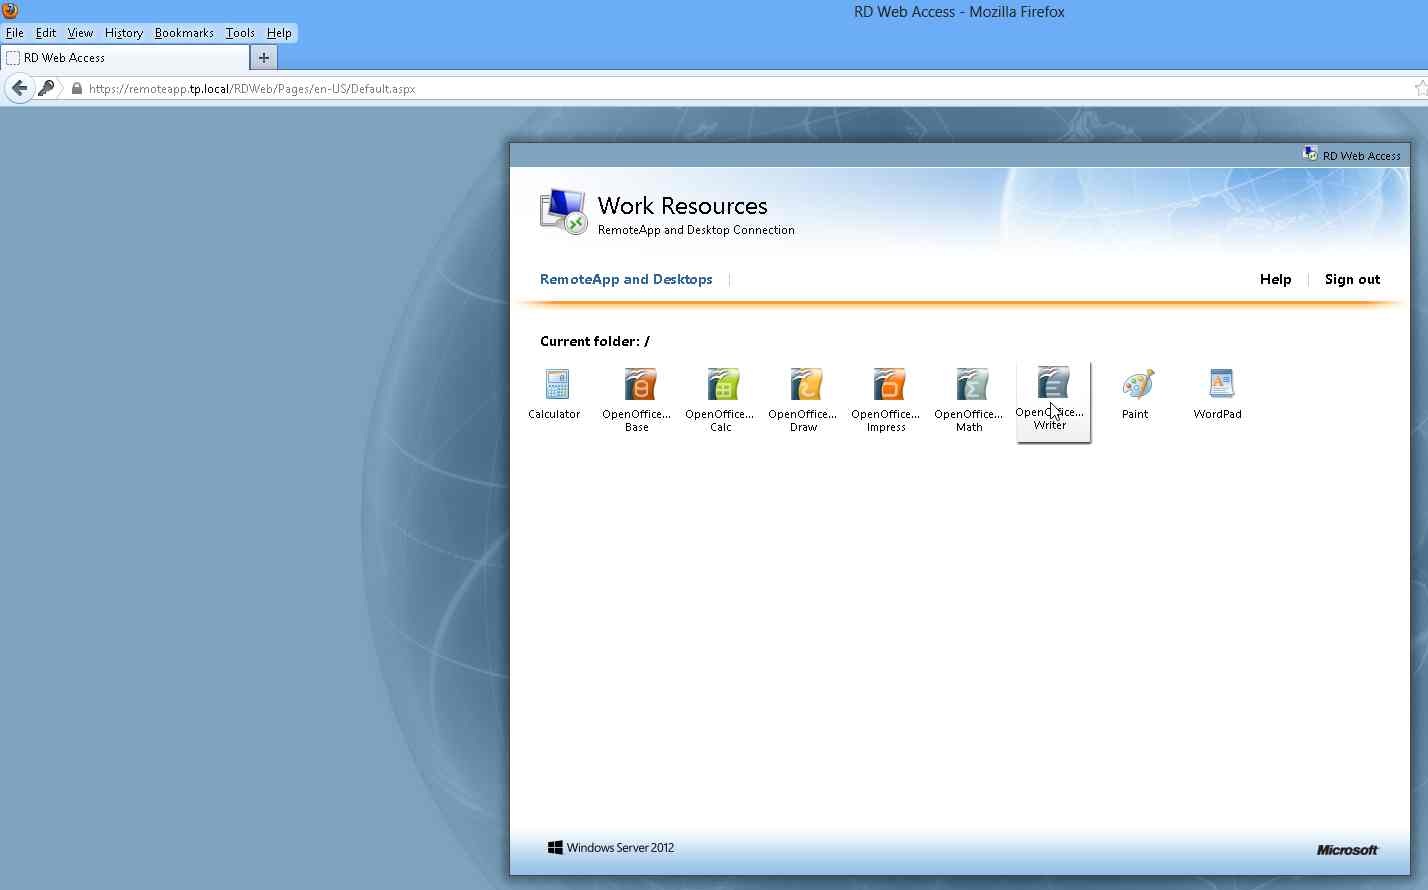
 Availability of the applications is important in our Technical Support department. We need the applications to perform tasks that we need to do our job. RemoteApp is the Windows 2012 solution that allows to install Windows applications on the server and deliver those application to the RDP capable clients. The applications are using the resources on the server, but appear as if they are running on the client’s device.
It took me about an hour to install and configure RemoteApp and few more hours to install most of the applications that we use for technical support. Now anyone in the company can open up their favorite browser, go to remote desktop web portal, and launch the applications they need.
If this sounds like something that could be useful to you, these instructions should help you get up and running.
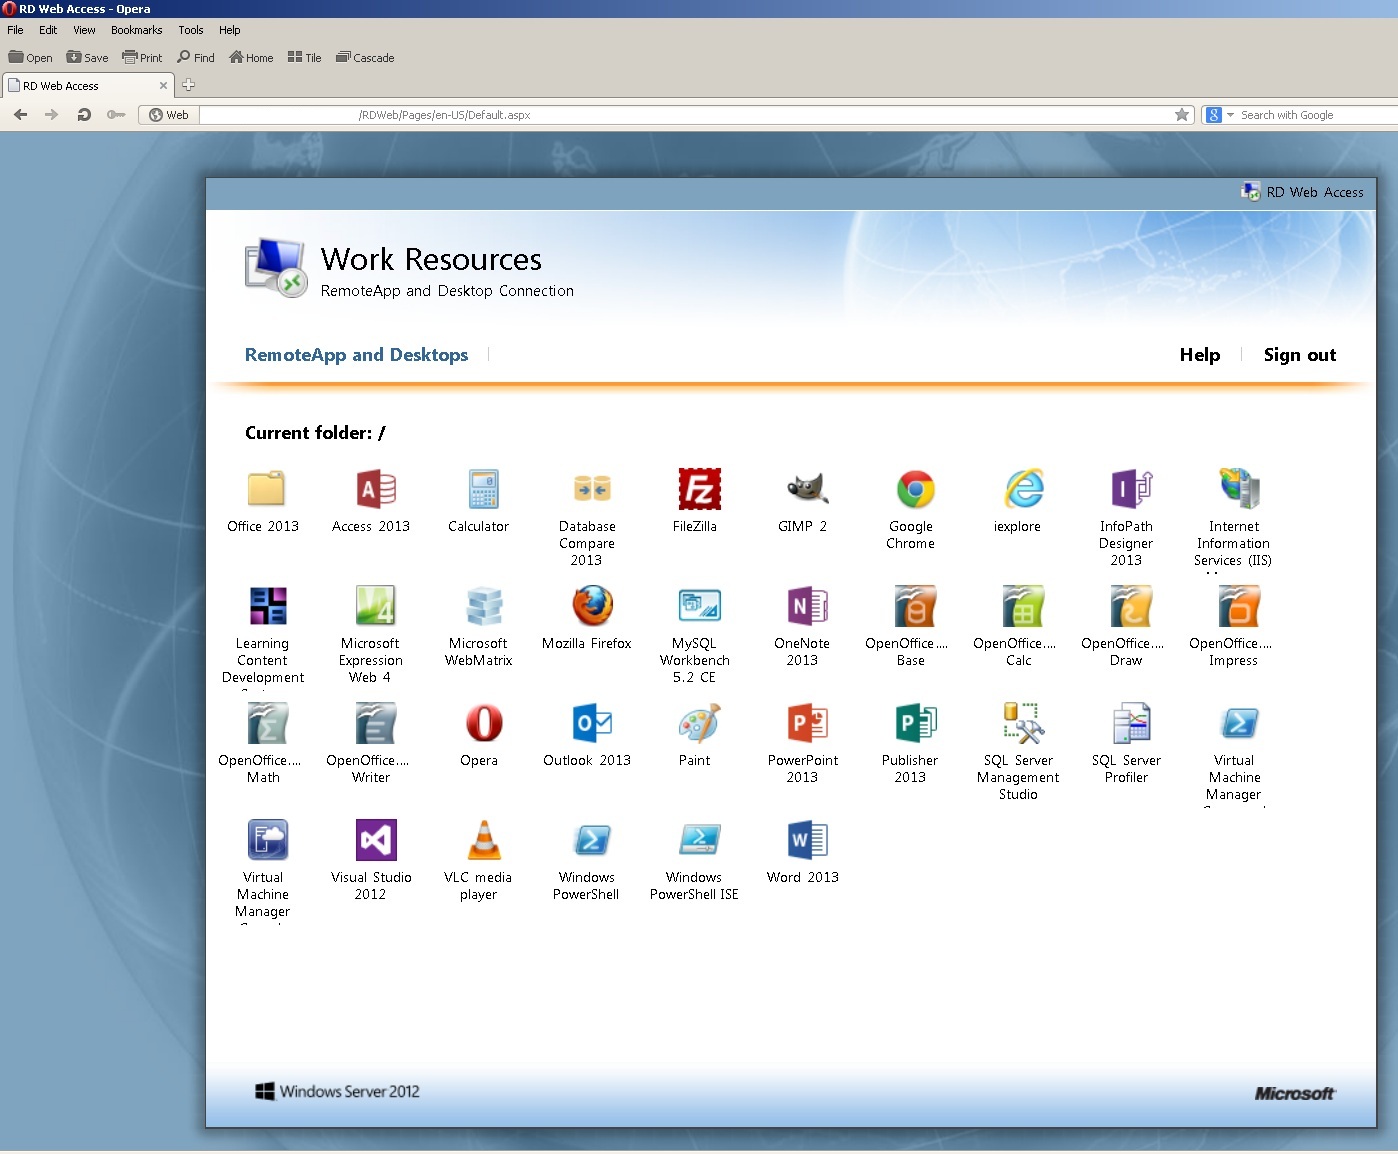
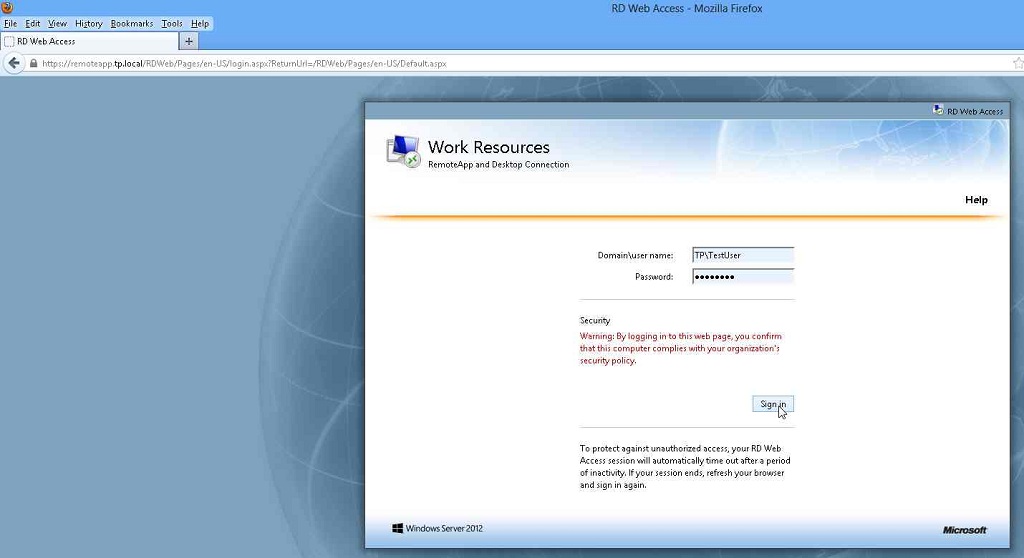
Here is what the Remote Desktop Web Access portal looks like when opened in a browser.
You can install and configure RemoteApp in less then an hour given that you have Windows Server 2012 installed and joined to a domain. Although you can install it on the same physical server, the best is to install it on a Virtual Machine so you can take a snapshot of the VM before installing a new application. To install RemoteApp, please follow the instructions below:
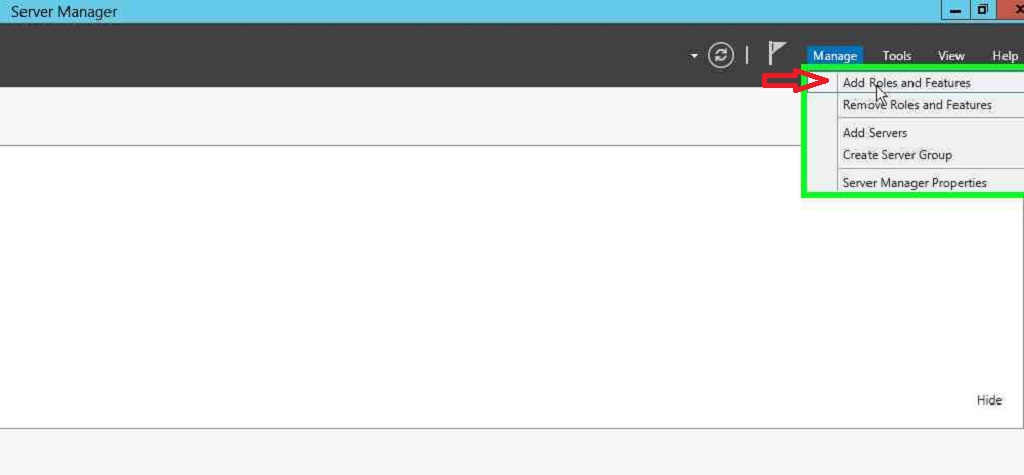
– Click “Manage” in “Server Manager”
– Select “Add Roles and Features” from the drop-down menu
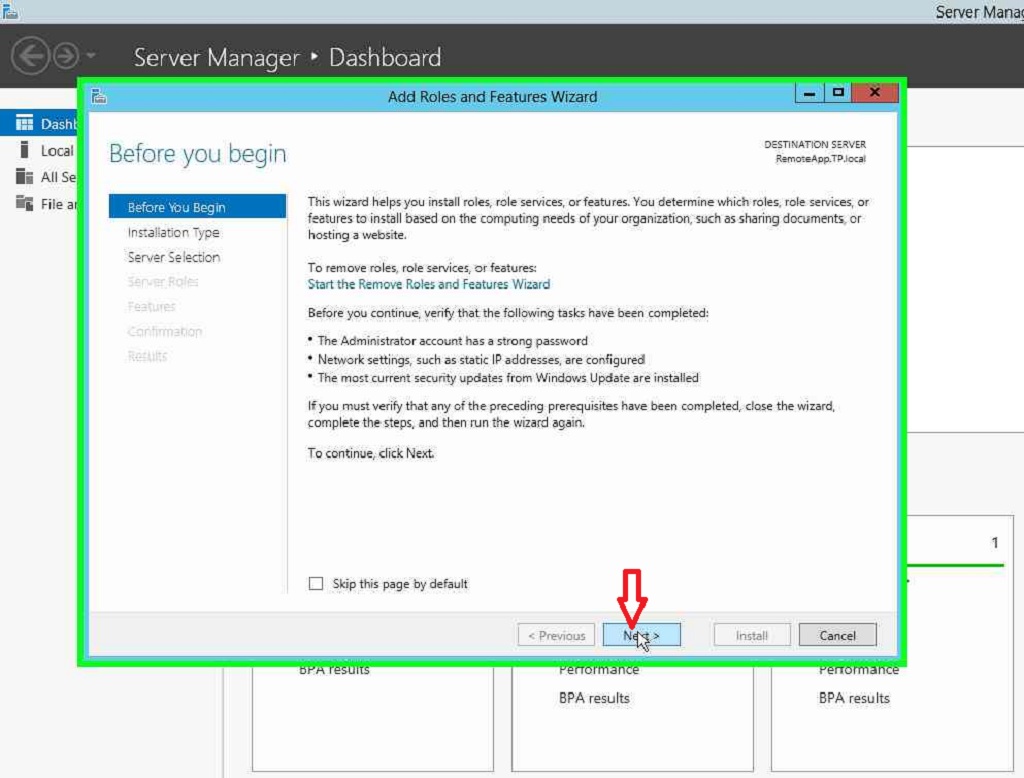
– Click “Next” in “Add Roles and Features Wizard”
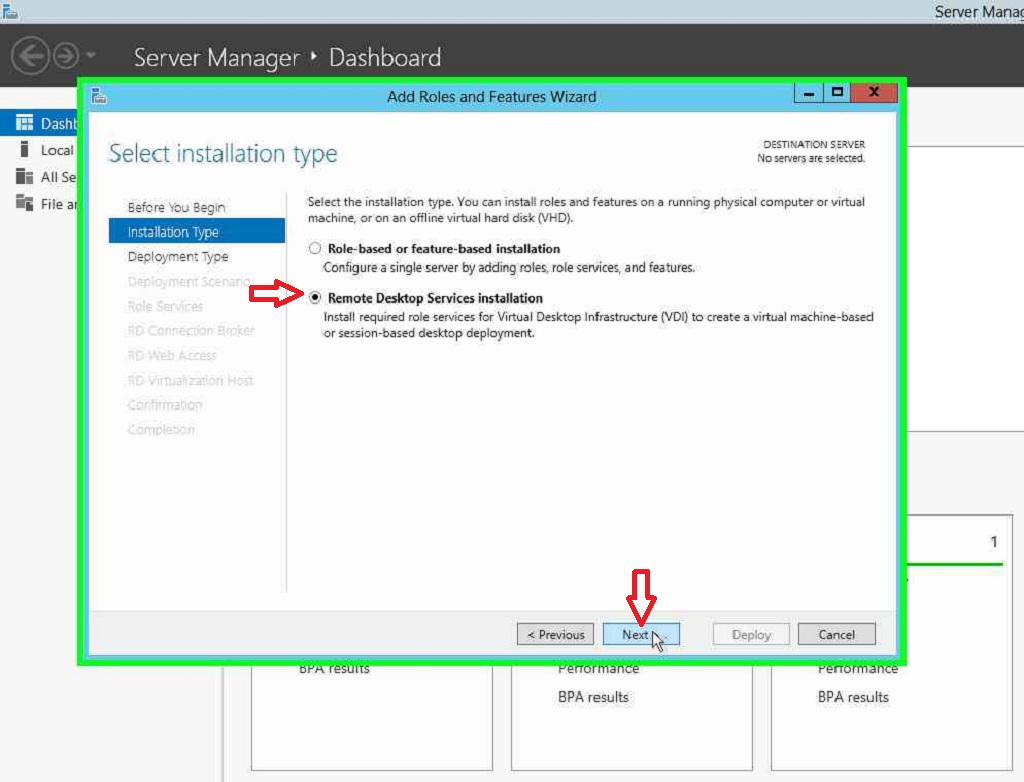
– Select the “Remote Desktop Services installation” radio button in “Add Roles and Features Wizard”
– Click “Next” in “Add Roles and Features Wizard”
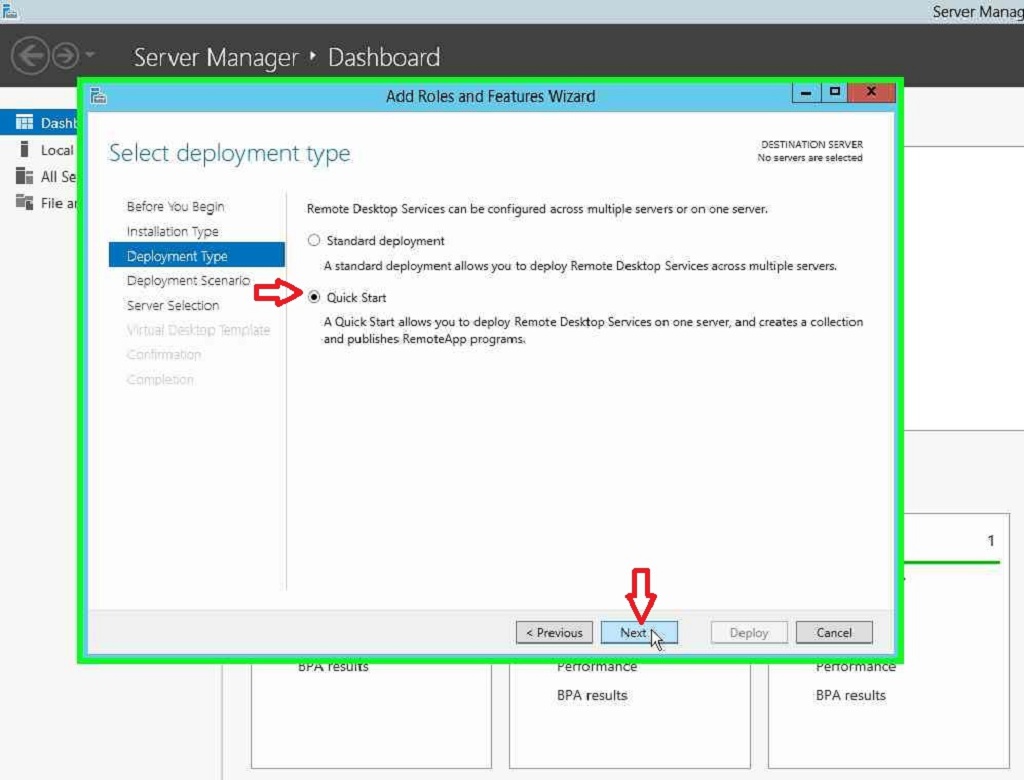
– Select the “Quick Start” radio button in “Add Roles and Features Wizard”
– Click “Next” in “Add Roles and Features Wizard”
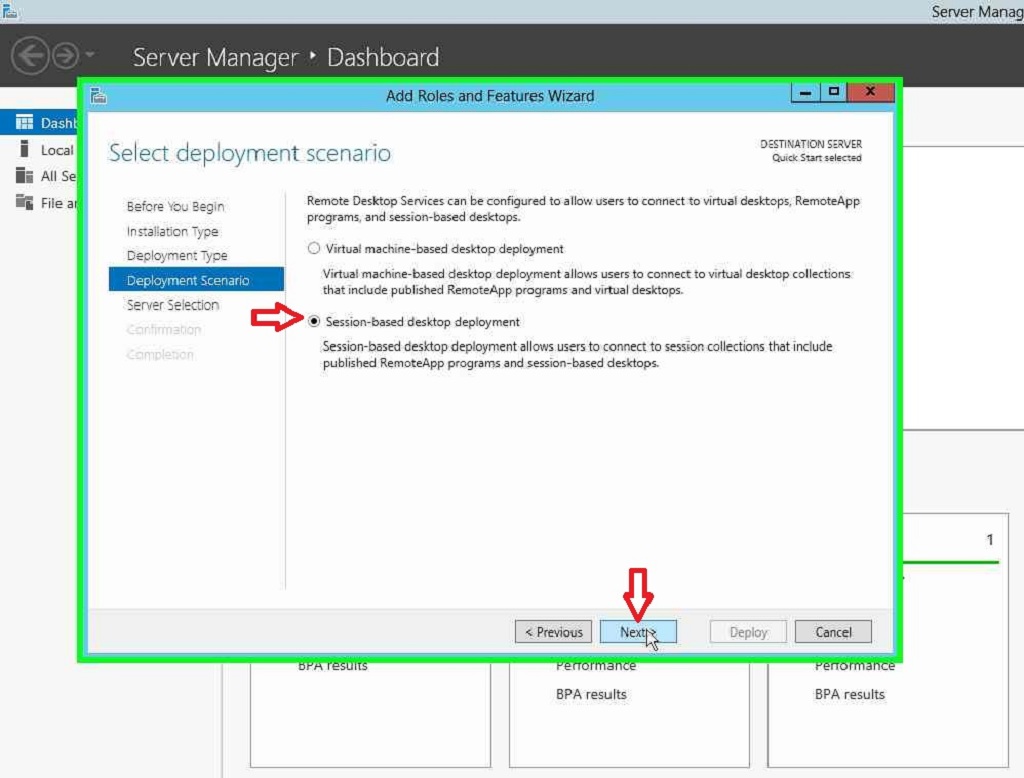
– Select the “Session-based desktop deployment” radio button in “Add Roles and Features Wizard”
– Click “Next” in “Add Roles and Features Wizard”
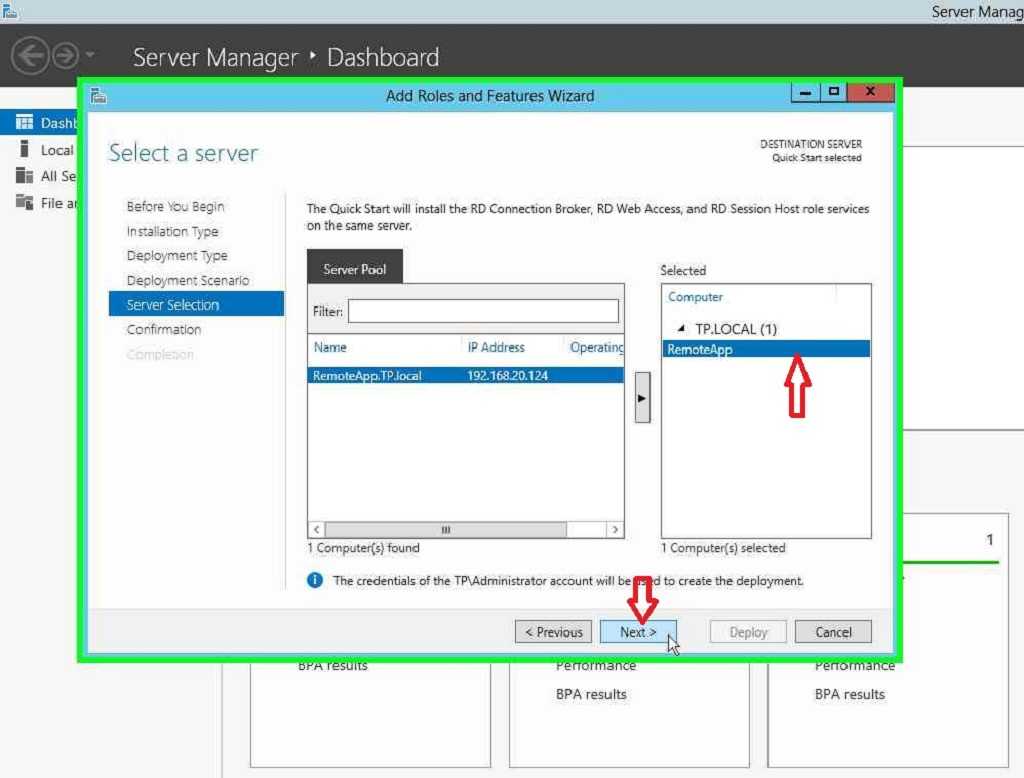
– Select the server from the “Server Pool” on which you will be installing RD services
– Click the “Next” button in “Add Roles and Features Wizard”
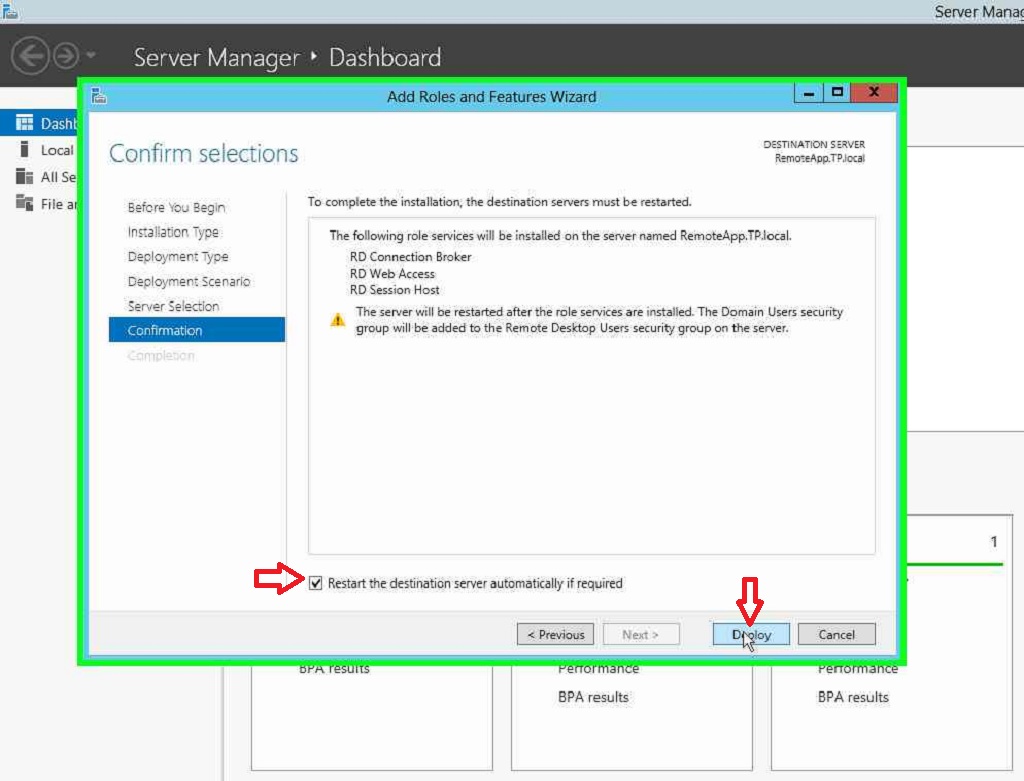
– Select the “Restart the destination server automatically if required” check box in “Add Roles and Features Wizard”
– Click the “Deploy” button in “Add Roles and Features Wizard”
Publishing RemoteApp Programs
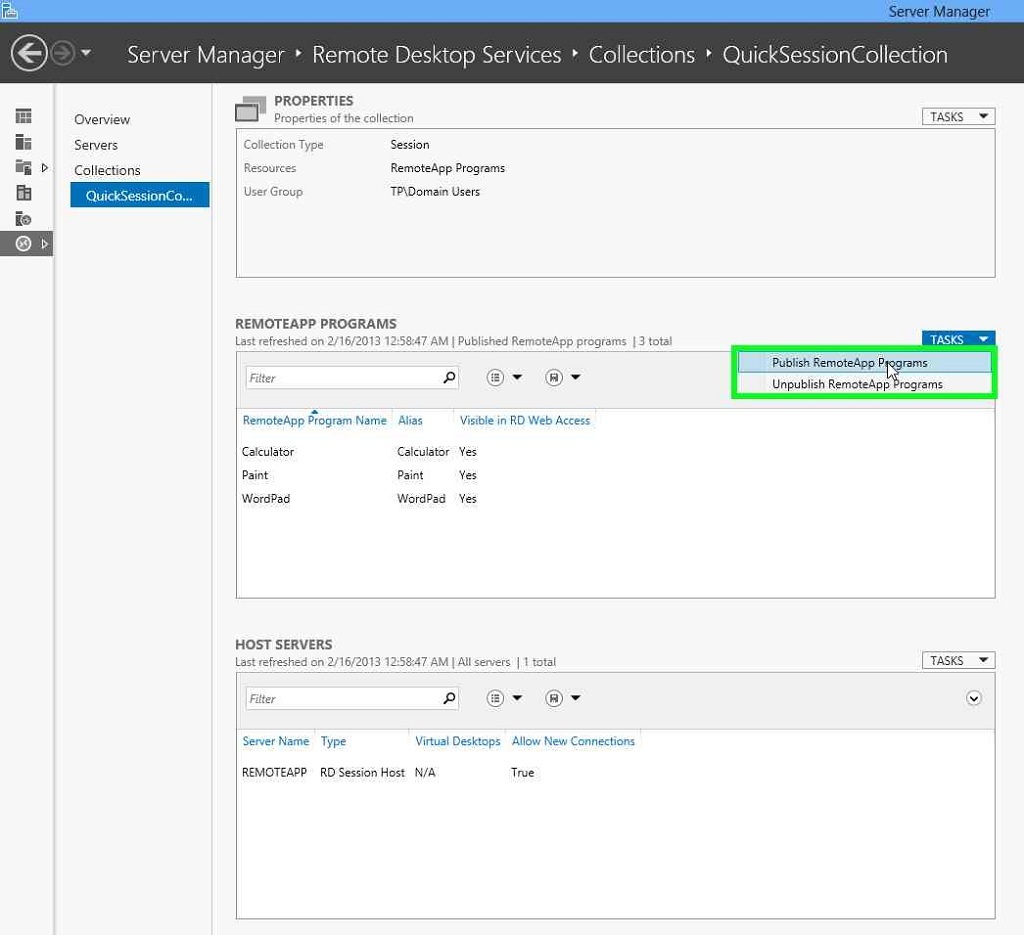
– In “Server Manager” navigate to “Remote Desktop Services” / “Collections” / “QuickSessionCollection”
– Under “RemoteApp Programs” section click “Tasks”
– Select “Publish RemoteApp Programs” from the drop-down menu
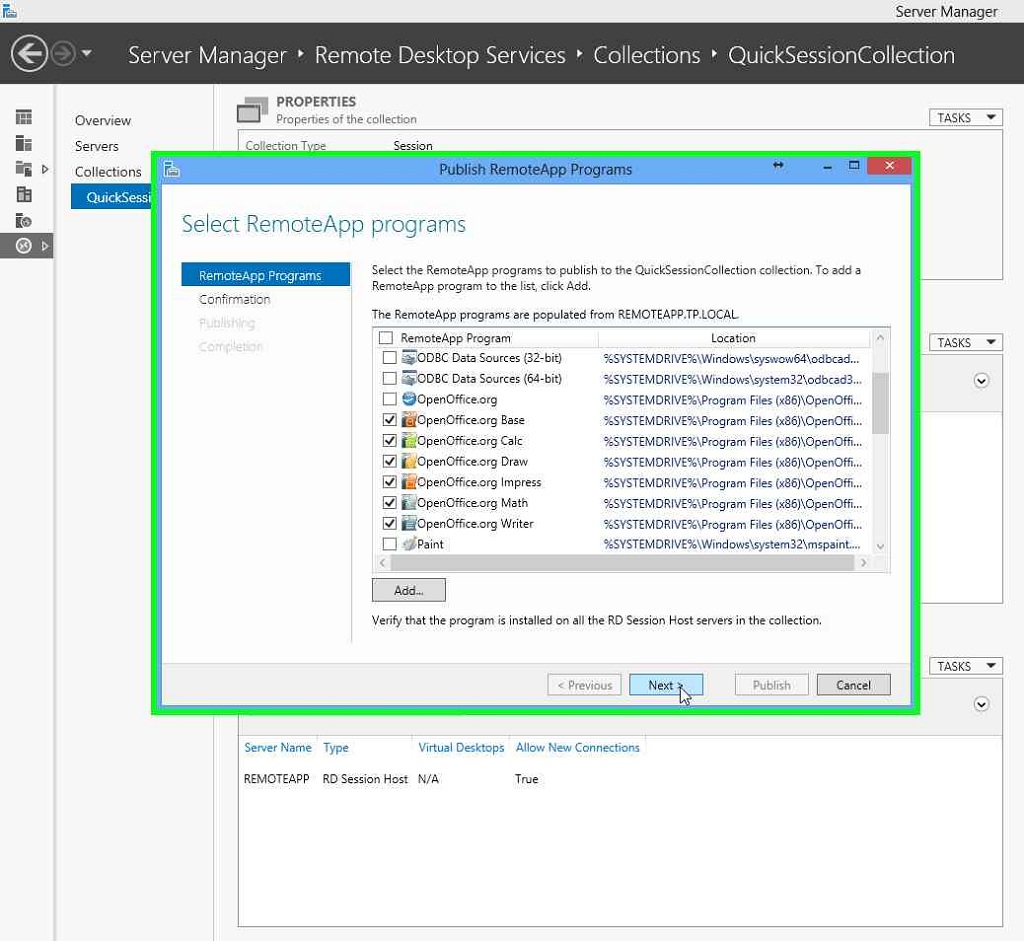
– Select the applications that you want to publish in “Publish RemoteApp Programs” and click “Next” button.
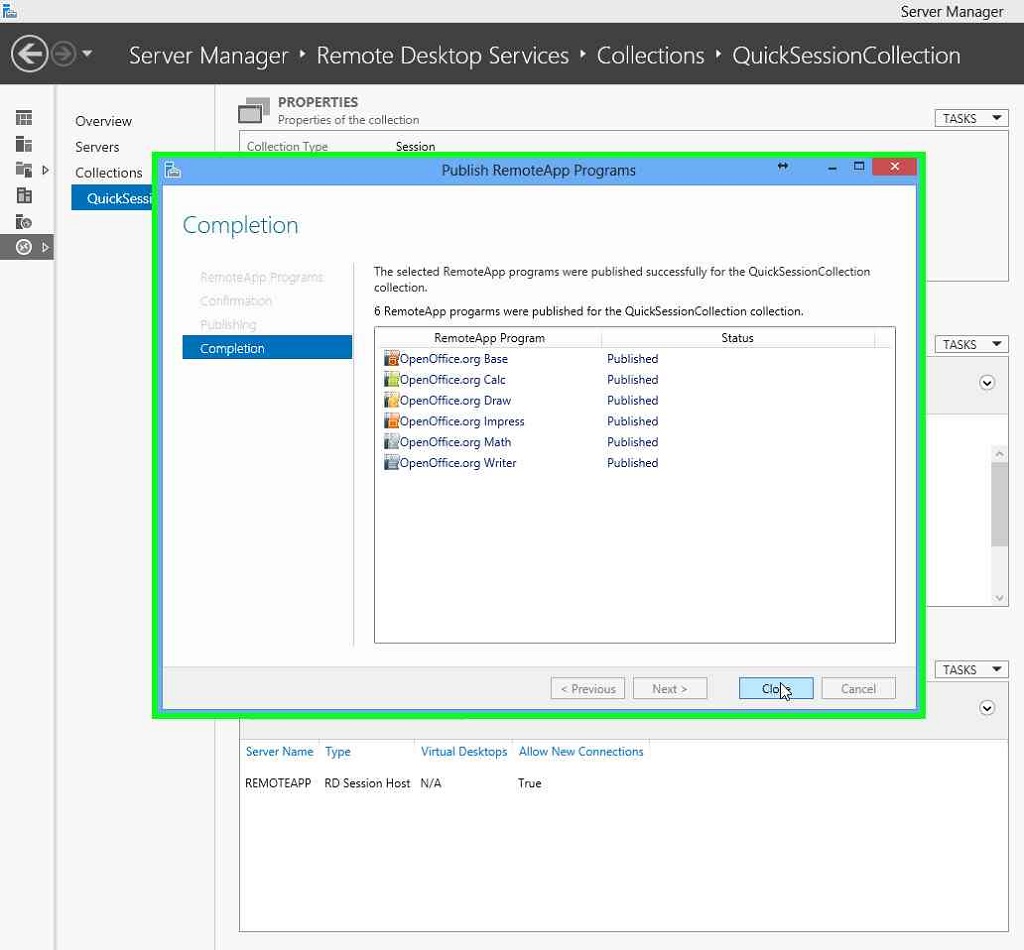
– Close the “Publish RemoteApp Programs” wizard upon confirmation that your application were published.
Working With Your RemoteApp Applications Remotely
You can access your Remote Desktop Web Portal by typing “https://remoteapp.tp.local/rdweb/” in your web browser, replacing “remoteapp.tp.local” with your own host name.
You can ignore the self-signed certificate warning. You can install a trusted certificate later on if you wish.
– Provide the credentials for your domain user at the login prompt and hit the “Sign in” button

