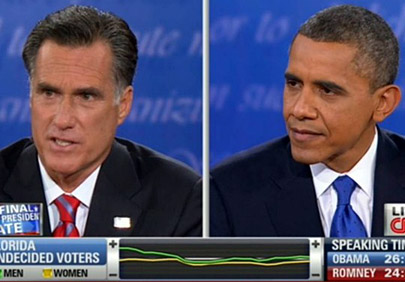
 If you are anything like me, watching the Presidential Debates was an exercise in not being distracted by the “dial-o-meter” at the bottom of the screen.

Since the two biggest features of HTML 5 are Canvas and WebSockets, I thought a Dial-o-Meter would lend itself well to a simple sample project that pretty much anybody could follow along with.
So in this post, we are going to build the “Dial” using Canvas and WebSockets. Maybe in a future post we will upgrade and complete the project, using SignalR.
First some prerequisites. Since we’ll be using the final release of ASP.NET 4.5, there is no need to use any Nuget package. We will be concentrating on the System.Web.WebSockets namespace.
WebSocket support is only available in ASP.NET 4.5. This means you will need to be on IIS 8. If you have not yet migrated, you will need to do so (In the Account Information section of Control Panel, look for “Server Type” and you can find an UPGRADE link there). If you are already on an IIS 8 account, we will need to make sure your account is ready for WebSockets. Contact support and they can make the necessary WebSockets configuration for you.
It’s also important to note that if you are running Visual Studio 2012 on Windows 7, the application will not run locally. You will need to work on the application, then upload it to the server to run it. This is because WebSockets will only run on Windows 8/Windows 2012. On the client side, you will need a browser that supports HTML 5.
So whats the point of all this? The short version is that the WebSocket protocol provides us with the plumbing to maintain a persistent, two-way, communications channel between the client and the server. This is ideal for applications that require real-time updating. The most common use cases described are things like chat or a stock related application. With the plumbing here however, it wont be long before people turn to WebSockets for a host of other things as well.
Using WebSockets is much faster than servicing HTTP requests. This means using WebSockets could be a better solution than AJAX for large dynamic applications. So how do WebSockets Actually Work? You can look here for the details, but essentially an HTTP request is made and that connection is upgraded to a WebSocket connection.
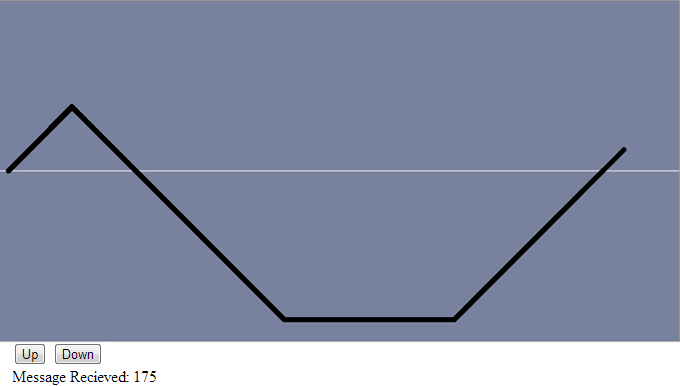
With all of that out of the way, let’s dive in and start with our HTML Page. There are two buttons to indicate Up/Down emotions that trigger messages to be sent to the server. There is also a canvas that will visually display the data that is returned from the server. For this post/sample, all we are doing is making a round trip.

Instead of the buttons affecting the canvas on the page directly, we will instead use WebSockets to send the data to the server, and have the server send the data back to the browser. Then, the canvas will be updated based on the server data. We do all this on the client side using JavaScript.
The entire project is included at the bottom of the post, but lets look at it section by section.
First the HTML controls. Nothing fancy here. The controls that we already talked about above and a place holder we will use to echo network communications.
<canvas id="myCanvas" width="800" height="400"></canvas>

 <input id="btnUp" value="Up" type="button" />
 <input id="btnDown" value="Down" type="button" /></pre>
<div id="dvNetworkStatus"></div>
<pre>
Now for the Heart of the page, lets look at the JavaScript that ties into the browsers API’s and makes all this work for us. Again, one section at a time.
Here we are defining our WebSocket endpoint and tying up the websocket object that is exposed to us to some custom functions. When the WebSocket connection is opened, closed, or we receive a message from the server, we want a specific function to be fired.
<script type="text/javascript">// <![CDATA[
              $(document).ready(function () {

                  var wsUri = "ws://iis8hosting.com/websocketblog/wshandler.ashx";
                  websocket = new WebSocket(wsUri);
                  websocket.onopen = function (evt) { onOpen(evt) };
                  websocket.onmessage = function (evt) { onMessage(evt) };
                  websocket.onclose = function (evt) { onClose(evt) };
                  websocket.onerror = function (evt) { onError(evt) };
With our WebSocket object setup, lets get the canvas ready. We setup the canvas object then initialize it. The reason we initialize it in its own function is because we will want to clear it out later again when it gets full. So we put that piece in its own function so we can just call it again later. The canvas works with an X/Y coordinate system so we want to initialize those values as our baseline as well.
                  var canvas = document.getElementById('myCanvas');
                  var context = canvas.getContext('2d');
                  var xCoordinate = 10;
                  var yCoordinate = 200;
                  initCanvas();

                  function initCanvas() {
                      canvas.width = canvas.width;
                      context.fillStyle = "#78829E";
                      context.fillRect(0, 0, 800, 400);
                      context.beginPath();
                      context.strokeStyle = 'white';
                      context.moveTo(0, 200);
                      context.lineTo(800, 200);
                      context.stroke();
                      xCoordinate = 10;
                      context.beginPath();
                      context.moveTo(xCoordinate, yCoordinate);
                      context.strokeStyle = 'black';
                  }
The next set of functions correspond to various states of our WebSocket connection as defined up top. Notice all we are doing with them now is updating our little status place holder. Also, notice the wsSend function. This is the function responsible for actually sending the data across the wire. The onMessage function is fired when we receive a message from the server. Notice it calls the drawToCavas method to update the line on our canvas.
                  function onOpen(evt) {
                      $('#dvNetworkStatus').text("Server Status: Connected");
                  }

                  function onMessage(evt) {
                      $('#dvNetworkStatus').text("Message Recieved: " + evt.data);
                      drawToCanvas(evt.data);

                  }

                  function onClose(evt) {
                      $('#dvNetworkStatus').text("Server Status: Closed");

                  }

                  function onError(evt) {
                      $('#dvNetworkStatus').text("Server Status: Error Connecting USE FIDDLER TO DEBUG!!!!");

                  }

                  function wsSend(message) {
                      $('#dvNetworkStatus').text("Message Sent: " + message);
                      websocket.send(message);
                  }
Next up is our drawToCanvas function. We make sure our X/Y coordinates are within the bounds of our canvas, if they are not, we call the initCanvas function descibed above to give us a clean slate. Then we simply draw the line onto the canvas.
                  function drawToCanvas() {

                      // If we get close to the edge of the canvas, clear and start over.
                      xCoordinate = xCoordinate + 25;

                      if (xCoordinate > 740) {
                          initCanvas();
                      }

                      context.lineTo(xCoordinate, yCoordinate);
                      context.lineCap = 'round';
                      context.lineWidth = 6;
                      context.stroke();
                  }
Lastly, the two functions responsible for our button clicks. Now this could have been one function but lets keep things simple. The key thing to note here is that the clicks are calling the wsSend function mentioned above and passing the updated yCoordinate.
                  $('#btnUp').click(function () {
                      if (yCoordinate > 25) {
                          yCoordinate = yCoordinate - 25;
                      }

                      wsSend(yCoordinate);
                  });

                  $('#btnDown').click(function () {
                      if (yCoordinate < 375) {
                          yCoordinate = yCoordinate + 25;
                      }
                      wsSend(yCoordinate);
                  });

              });

// ]]></script>
That’s it for the client side. Now on to the server. We are going to create a generic handler and use Async & Await to service the requests. Again, step by step. First, we need to make sure that the request coming in is indeed a WebSocket request. If it is, our async task called MyWebSocketTask will service the request. This is where we accept/upgrade our connection request. If its not, throw an exception.
    public class wshandler : IHttpHandler
    {

        public void ProcessRequest(HttpContext context)
        {
            if (context.IsWebSocketRequest)
            {
                context.AcceptWebSocketRequest(MyWebSocketTask);
            }
            else
            {
                throw new HttpException("This isn't a WebSocket request!");
            }

        }
Here is our brain. We are going to wait for a message, then simply echo that message back to the client.
        public async Task MyWebSocketTask(AspNetWebSocketContext context)
        {
            WebSocket socket = context.WebSocket;

            while (true)
            {
                ArraySegment<byte> buffer = new ArraySegment<byte>(new byte[1024]);

 // Asynchronously wait for a message to arrive from a client
 WebSocketReceiveResult result =
 await socket.ReceiveAsync(buffer, CancellationToken.None);

 // If the socket is still open, echo the message back to the client
 if (socket.State == WebSocketState.Open)
 {

 string userMessage = Encoding.UTF8.GetString(buffer.Array, 0,
 result.Count);

 buffer = new ArraySegment<byte>(Encoding.UTF8.GetBytes(userMessage));

 // Asynchronously send a message to the client
 await socket.SendAsync(buffer, WebSocketMessageType.Text,
 true, CancellationToken.None);
 }

 else
 {
 break;
 }
 }
 }
That’s all there is to it. I hope this gave you an idea of where you can go with WebSockets. Maybe all the way to 1600 Pennsylvania Avenue…

Great sample. This is the first websocket demo that actually works as downloaded (except for the need to add registration in web.config).