 After taking point for our Team Foundation Server hosting service, it’s been a very busy past 10 months as I’ve been involved in:
- Sharing the knowledge that we’ve acquired in the TFS Knowledge Base
- Publishing technical information through the DiscountASP.NET Blog
- Handling migration services to the DiscountASP.NET TFS server
- Introducing Build Server as an additional service
One of the luxuries that I’ve also been afforded is some time to play around with other technologies involved in the ALM process beyond Team Foundation Server itself. In the past few months, I’ve spent a considerable amount of time working with Git and I thought I’d take a moment to share some information from the perspective of someone who has been using Visual Studio 2010 exclusively.
Doing some work from the command-line isn’t a foreign concept to me but after having spent so much time getting used to working from Visual Studio directly, there was a bit of a learning curve involved because I’ll admit it, I’m a “clicker.”
If you’re moving into Git or it’s been something that you’ve been considering but think there’s a high learning curve involved, understanding and using the command-line is absolutely essential, however, there are ways to have a normal workflow using Git and Visual Studio 2010.
I won’t be taking an in-depth look at Git but I’ll be focusing on simplifying things a bit by using Git Extensions and Git Source Control Provider.
Git Extensions offers a GUI that you can work with while you become accustomed to using the command-line and Git Source Control Provider is a plug-in for Visual Studio that includes functionality and features in the Solution Explorer that you’re probably used to.
First, download and install Git Extensions.
Next, you’ll need to pick up Git Source Control Provider at CodePlex for Visual Studio 201 and run the GitSccProvider.vsix to install the plug-in or access the Extension Manager from the Tools menu and install Git Source Control Provider.
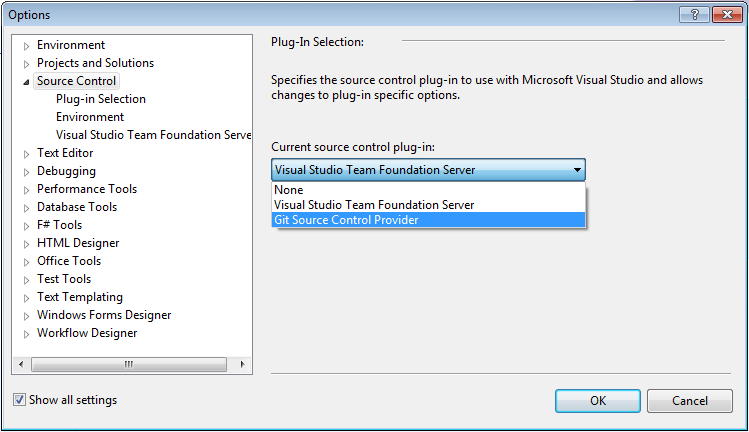
Once you’ve completed the installations, launch Visual Studio 2010 and then change the source control plug-in by opening the Tools menu and selecting the Options menu item. Check the “Show all settings” box, select the “Source Control” option and set the plug-in to “Git Source Control Provider.”
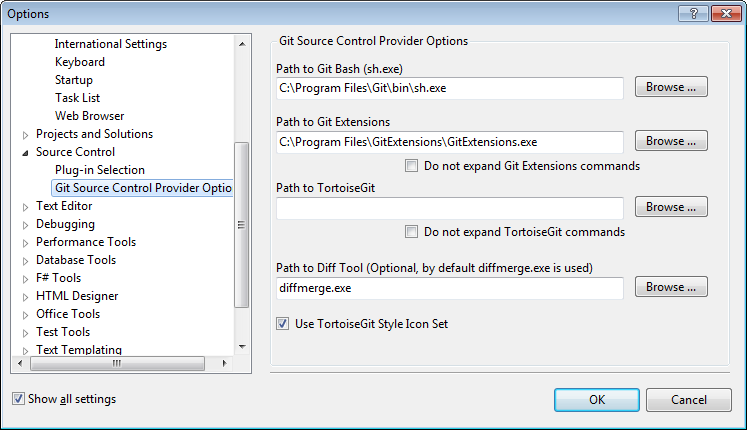
While you have the Options window open, click on the “Git Source Control Provider Options” to make sure that the paths are set properly.
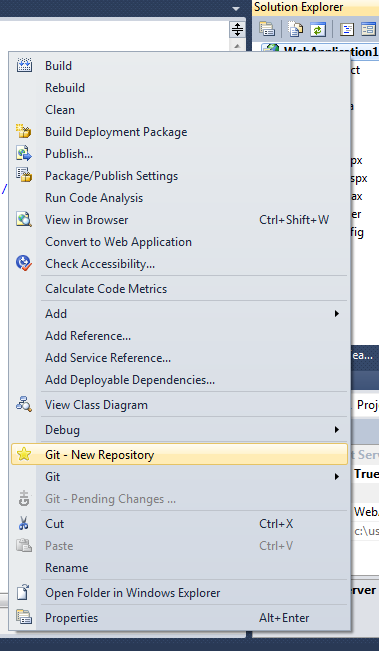
I’ll be creating a new Web Application Project but you can use an existing Project. Right-click on the Project name and then click on the “Git – New Repository” menu item.
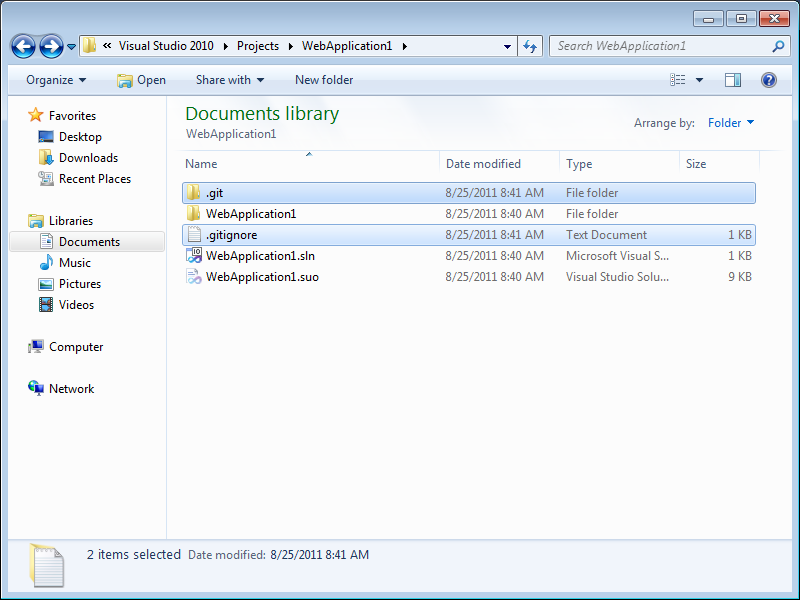
You can open the Project folder through Windows Explorer to make sure that everything’s been created properly.
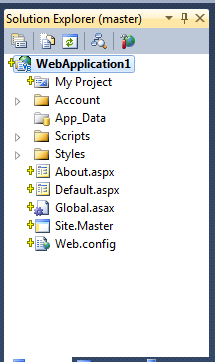
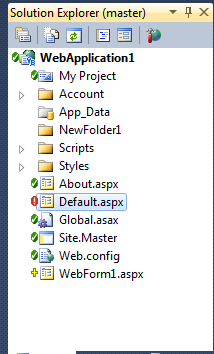
You should see something that’s familiar in the Solution Explorer since you’re probably used to see yellow plus symbols to denote that there are new files.
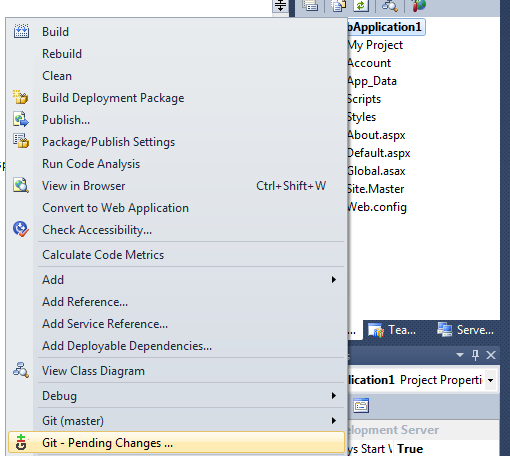
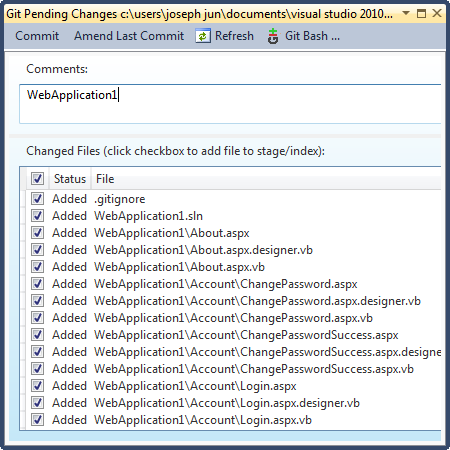
Since I’m working on a new Project, I’ll commit the new files by using the “Git – Pending Changes…” option.
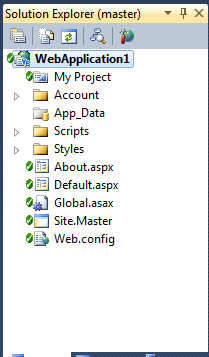
All of the files that have been committed have a green check mark next to them.
I’ve added a new file and made a change to an existing file and the markers are very easy to understand.
I’ll commit the pending changes.
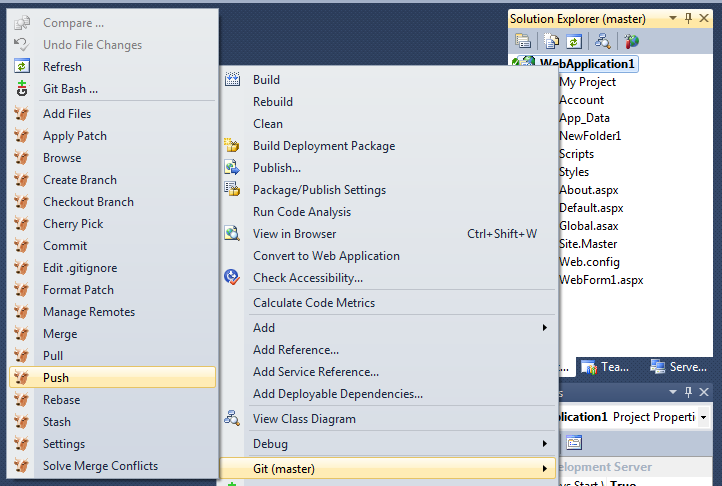
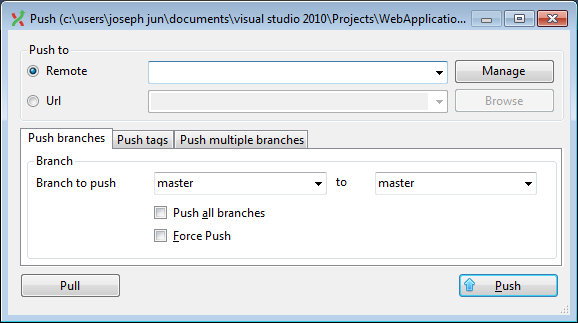
To define a main repository and push your work, just right-click on your Project name from the Solution Explorer, run your mouse over “Git (master)” and then select the “Push” option.
I hope that the information helps as this is the same method that I’ve taken to get used to the Git command-line commands while working at the same time.


Excellent post, very well done.
I personally have found that Mercurial (Hg) has better tools for windows, although git is catching up. You can still use tortoiseHg and therefore VisualHg (the VS plugin) to perform the same operations as above, and if you really love git you can even use the hg-git plugin to allow you to sync back with your git repository http://hg-git.github.com/
Enjoy whichever you choose.
Great article!
What advice would you have to someone using VS2008? (yes unfortunately we partly have to since Windows Mobile is not supported in VS2010)
Some other plugin available?
Cheers
Ok I just realized there is the same plugin (but another install) for VS2008 as well, http://gitscc.codeplex.com/releases/view/46589 🙂
Hi,
I am very new to Git, but as far is i’ve readed, you are not uploading your repository to anywhere.
What if I have a Git server (either a custom installation or on github) ? How have I to configure gitextensions or git source control provider?
Thanks
I am using Visual Basic Studio 2010 Express and it does not work!
Do I have to buy the professional edition to use it?
Mario –
You are correct. You need the paid versions to be able to do this.
Charles
You can’t install plug-in with any Express edition
I am new to GIT, and would like to maintain–
https://github.com/epsylon3/odbgscript
I have Visual Studio 2008 Pro up and running.
I have installed Git Extensions
I have installed Git Source Control Provider…
and have set the paths according to the example above.
I don’t know how to receive the drop down …Build.Rebuild.Clean..GIT-New Repository…
Do I File/New/-what kind??? or File/Open/???
in order to begin maint of the above GIT files?
tkx, Paul
Hello Mr. Jun!
I found your tutorial and it helped me so much. Well, I’m from Brazil then I would like to translate it to portuguese and public it. May I?
Very useful information. Worked like a charm for VS2010
Thanks! How do you set up a shared repository that the whole team can use (on the LAN)?
Hi,
I am very new to Git. i have question about how can i log in to gitlab website from VS2010 (my own website that develop by visual studio 2010 ). I read more but don’t know anything about it. Thanks for your help.
Excellent post !
Just an fyi – the plugin doesn’t work very well, if you customize your theme in visual studio. It just couldn’t display my pending changes list items.