Using Web Deploy 2.0 on your DiscountASP.NET Team Foundation Server 2010 Build Server

Joseph JunWhen we launched our hosted Team Foundation Server 2010 Build service, an active outbound Internet connection was not available. But after receiving many requests, we made plans to perform an infrastructure-related update that would accommodate the needs of our customers. We have been working tirelessly behind the scenes and I’m happy to announce that the project has been completed – you can now connect to an outside system!

As a showcase, I thought I’d do a small write up on deploying directly from one of our TFS Build servers to a server in our web hosting environment so let’s go over the steps that you’ll need to perform.

1. Use the Team Foundation Server Hosting Support Portal and open a request with the technical support team to get Web Deploy 2.0 installed on your TFS Build server.

2. After we’ve completed the installation, access the IIS Tools utility in your DiscountASP.NET Control Panel (web hosting) and make sure that the version of the .NET Framework is selected.
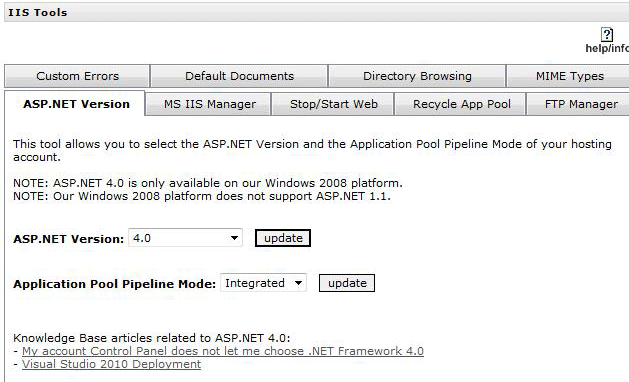
3. You can use an existing Team Project but for this article, we’ll use a C# Web Application.
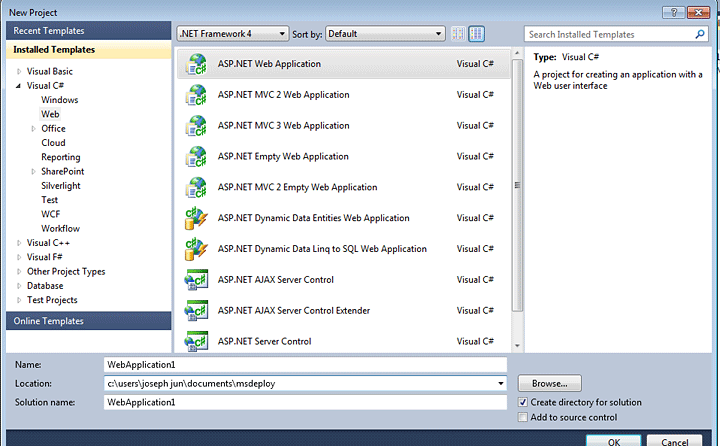
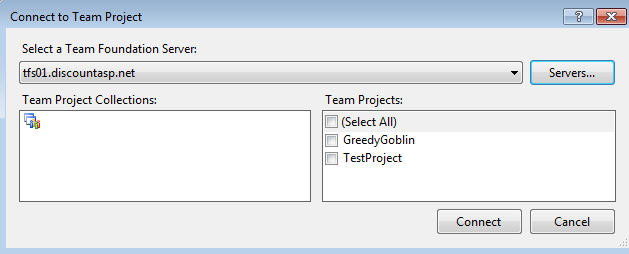
4. After you’ve created the Web Application Project, connect to your Team Foundation Server 2010 server. If you’re a new user, follow the steps available in the DiscountASP.NET TFS Knowledge Base for configuration instructions.

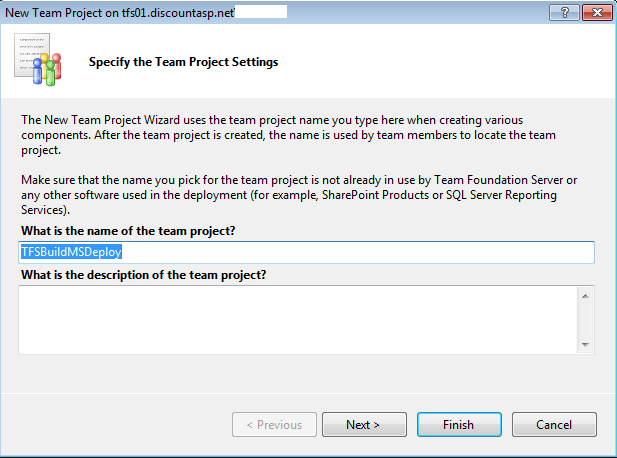
5. Create a new Team Project. In the event that you need a reference, use the steps in our Create a new Team Project using Visual Studio 2010 article.
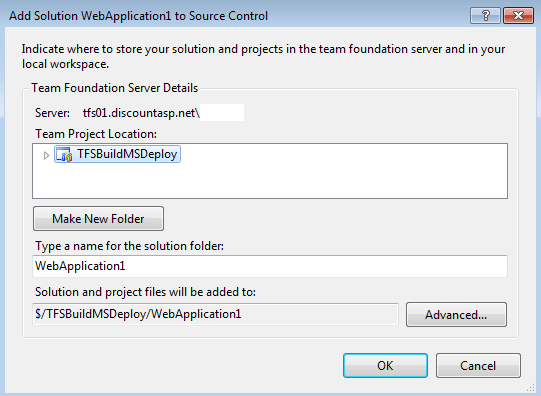
6. Add the Visual Studio project that you’ve created to source control. For help with this particular step, you can start from step number five in our Getting Started with Team Foundation Server guide.
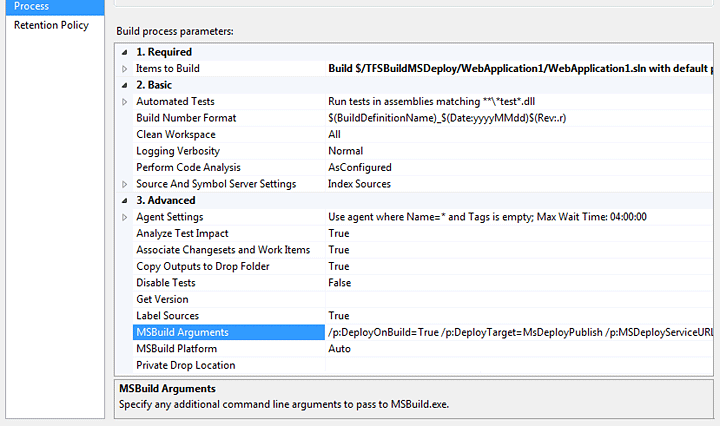
7. You can modify an existing Build Definition or you can use the steps in the How to create a Build Definition article to create a new Build Definition and when you reach the Process step, click on Advanced and locate MSBuild Arguments.

8. In order to proceed, you’ll need your web server information which can be found on the Account Information page. You’ll need to prepare the following line and then add it to the MSBuild Arguments:

/p:DeployOnBuild=True /p:DeployTarget=MsDeployPublish /p:CreatePackageOnPublish=True /p:DeployIisAppPath=”HostedDomainName/myapp” /p:MsDeployServiceUrl=WebServerName.discountasp.net:8172/MsDeploy.axd /p:username=AccountUserName /p:password=AccountPassword /p:AllowUntrustedCertificate=True

9. Add the information to the TFS Build Definition, save the changes and then execute a build.
10. Once the build has completed, access the deployed application.
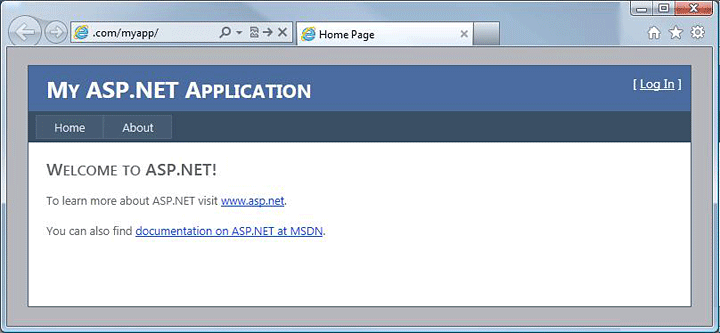
While the example that was provided targeted a hosted site specifically, you are not limited to just the DiscountASP.NET servers, you can deploy to any system that’s been configured to receive connections.

If there are any technical questions you might have, feel free to contact the support team.

Node.js Has Arrived

Michael PhillipsThat’s right, Node.js, is now available on your DiscountASP.NET hosted site. The latest hot development platform that you’ve been seeing, reading about (and asking us for) is here.

If  server-side JavaScript is a new concept to you, you should take a look at Node.js. Node.js is a platform for building fast, scalable network applications in a way that should be easy and familiar for anyone who has ever written or worked with JavaScript.

This is classified a beta service, since Node.js is still a 0.x.x release, and it is not available on our older IIS6 servers.

But if your DiscountASP.NET site is hosted on one of our IIS7 servers, Node.js is available right now. Take it for a spin and let us know what you think.

Managing an FTP site as a local drive

Tonny FuseinThis article will show you how to manage your FTP site by mounting it as a local drive on your computer. This gives you the flexibility of moving the files around like you would with normal windows files.

Download and install the Netdrive application on your local computer. This application is free for non-commercial use.

Once download and installed, configure Netdrive to access your site via FTP. These are the same settings you would use for any other FTP clients.

Put a check mark on the “automatic login” options so the FTP will be mounted as a Windows drive every time you start Windows.

Once connected, you will see that the FTP root of your site is now mounted as a Windows drive with the drive letter assigned by the Netdrive app.

To unmount the drive, simply go back to Netdrive and hit disconnect. Don’t be alarmed by the drive size;  Netdrive has it fixed at 512GB, so this won’t reflect your actual disk space on the server.

Win a free ticket to That Conference, August 13th – 15th

Michael PhillipsA tech conference with over 150 top-notch sessions to choose from, held at a giant indoor waterpark?

What could be better?

We could pay for your $349 three-day conference pass. That would be better, wouldn’t it?

That Conference bills itself as “Summer Camp for Geeks.” Held at the Kalahari Resort in the beautiful Wisconsin Dells, it covers everything code, apps, web and cloud.

A veritable slew of industry-leading speakers will be on hand to inform and enlighten, including Microsoft’s entertaining and unpredictable Scott Hanselman.

That Conference
August 13th – 15th, 2012
Kalahari Resort, Wisconsin Dells, WI

Contest runs from Friday, July 13th to Tuesday, July 31st. You can enter every day, and when you share the contest on Facebook you get three additional entries every time one of your friends enters!

DiscountASP.NET Customer Profile – Liam Cavanagh

Michael PhillipsToday we present a profile of Liam Cavanagh, the founder and CEO of Cotega, a Software-as-a-Service (SAAS) based solution for database administrators (DBA) looking to monitor the performance and health of their cloud hosted SQL Server and SQL Azure databases.

Using Cotega’s web based dashboard, administrators can track of all major aspects of their database and receive notifications when issues occur. Cotega was designed to give DBAs confidence that the database powering their web site is running smoothly.

Hello Liam, thanks for allowing us to do a profile. When did you first become interested in web technologies?

My background is in database administration and over the past 15 years I have worked on the engineering and product teams for many leading databases including SQL Anywhere, SQL Server and SQL Azure.  Over that time I have seen a huge surge in interest from customers looking to leverage cloud based technologies for database hosting.  When I started focusing on hosted database solutions I was surprised that I was not able to find tools available to the DBA optimized to work in this environment.  It was for this reason that I chose to start Cotega and focus on monitoring cloud hosted databases.
Which technologies are you currently using for your web site?

Our service uses:

  • ASP.NET MVC 4.0 using C#, JavaScript, JQuery and HTML5
  • Visual Studio 2010 SP1
  • Windows Azure, Windows Azure Table Store, Windows Azure Queues
  • SQL Azure, SQL Server 208 R2
  • Amazon Simple Email Service (SES)

How long have you hosted your site with DiscountASP.NET?

We have been using DiscountASP.NET since Jan 3, 2012.

Why did you choose DiscountASP.NET as your web hosting solution?

Our service consists of two key components.  The first is a monitoring service that checks a customer’s databases for issues and logs the results or sends notifications to the administrator when needed.  The second component is a Web based dashboard that a DBA uses to define what is to be monitored and analyze the results.  Both of these components were initially built on Windows Azure.    Windows Azure allowed us to ensure that the service was always available which was critical for the monitoring service.

For the web based dashboard, we were looking for a lower cost solution that performed well and allowed us to quickly release updates given how many changes the user interface was going through.  In the end, we chose to build a hybrid of services.  We chose to continue to host the monitoring service on Windows Azure and ported the web based user interface to DiscountASP.NET.  DiscountASP.Net provided us with a low cost solution for hosting as well as simple tools to quickly deploy updates.

Here is a diagram of the architecture:

So there was a benefit to using DiscountASP.NET…

Since our technologies are very Microsoft centric, it is important to us to work with a web hosting solution that is optimized for this environment.  The DiscountASP.Net portal was very easy to use and allowed us to integrate our MVC based application quickly and easily.  The sales and support staff were very easy to work with and had a lot of knowledge of Microsoft technologies that really helped our deployment go smoothly.

What are the future plans for your site? Are you excited about any future technologies or trends that you see on the horizon?

Analysis of “Big Data” in the cloud is one the trends that I find most exciting.  I feel cloud hosting is still very much in its infancy and companies are just now starting to see the value that it brings to them.  The ability to temporarily allocate many machines to provide huge levels of compute is now letting people analyze vast amounts of data in a very short period of time.

Technologies like database sharding where you span your data over multiple databases in a data center as opposed to scaling up a database on a single machine is allowing people to take advantage of multiple CPU’s to quickly retrieve data information, regardless of the amount of data they store.  All of this will require a level of database monitoring that we have not seen before, and this is where we see the future of Cotega.

The public cloud brings a new way of thinking for organizations.  Now it is so much simpler to choose the service that best fits your needs and get these services to work with one another.  When we were building Cotega, we were surprised how easy it was to piece together technologies that best fit our needs to create a “Hybrid” of services.

For example, our email notifications are sent using Amazon SES, the hosting of the monitoring service leverages Windows Azure’s capability to provide easy scaling, load balancing and high-availability and the Web site that the database administrator uses is built on DiscountASP.net which provides a simple environment optimized to host MVC applications.

All of these components worked incredibly well together and allowed us to keep costs extremely low yet continue to provide a highly available solution to our customers.

Thanks, Liam, for allowing us to do a profile!

Are you being penalized by Google for “duplicate content”?

Michael PhillipsA concern that crops up often in the forums and helpdesk is how to handle domain pointers, redirects and anything else that could lead to your site’s content being available at more than one URL.

A lot of people have read or been told that search engines in general, and Google in particular, will lower your site’s placement in search results if your site is available at more than one URL – the dreaded duplicate content penalty!

According to Google’s Greg Grothaus, there is no such thing. Unless you’re, you know, spamming or scraping content from other sites, in which case you probably should be penalized.

But even though there is not a penalty imposed by the search engines, if you use multiple URLs to point to the same content, you may be penalizing yourself.

Lot’s of great tips in this video from Google Webmaster Help. It could be worth your while to take a few minutes to watch.

Using Red Gate SQL Connect with DiscountASP.NET Team Foundation Server

Joseph JunAs a big fan of SQL Compare and after being impressed by SQL Source Control, I was excited when I got a message to try out a new Red Gate product, SQL Connect.

While SQL Source Control and SQL Connect offer the same underlying ability – adding a database to source control – the key difference is that SQL Source Control works in tandem with SQL Server Management Studio whereas SQL Connect allows the ability to work on your database directly from Visual Studio.

The ability to continue working on different aspects of an application without switching environments is a blessing – think of the amount of time that’s lost and the disruptions that you usually go through tabbing through open windows or using preview windows. Some key benefits are:

  • I’m mentioning it again because it really is critical: the ability to work on application-related and database-related projects in a single development environment.
  • Ability to create and execute queries and stored procedures from Visual Studio.
  • If some team members are already using SQL Source Control, SQL Connect can use the same repository.

The setup process is straightforward and simple so let’s go through a new installation.

1. If you don’t have a TFS hosting account, use the sign-up form and take advantage of the 30-day free trial that we offer.

2. Make sure that you have configured your client and I’d recommend creating a new Team Project using the instructions available in our knowledge base if you’re evaluating SQL Connect.

3. Before proceeding any further, take a look at the software requirements for SQL Connect.

4. If you have Visual Studio open, save any work and then close all instances that you have open.

5. Download the 28-day trial version of SQL Connect and then run the installer. Make sure that SQL Connect is selected and you can un-check SQL Prompt.

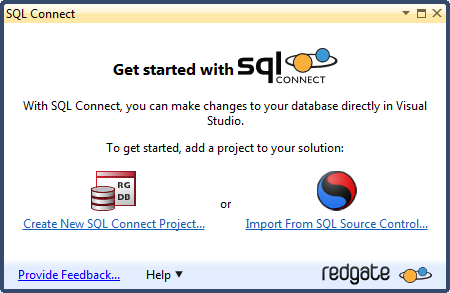
6. After the installation completes, open Visual Studio and you’ll see the SQL Connect window.

If you close this window, you can re-open it by going to: View > SQL Connect.It’s not something that I’ll be covering but note that you can import from an existing SQL Source Control project at this point as well.

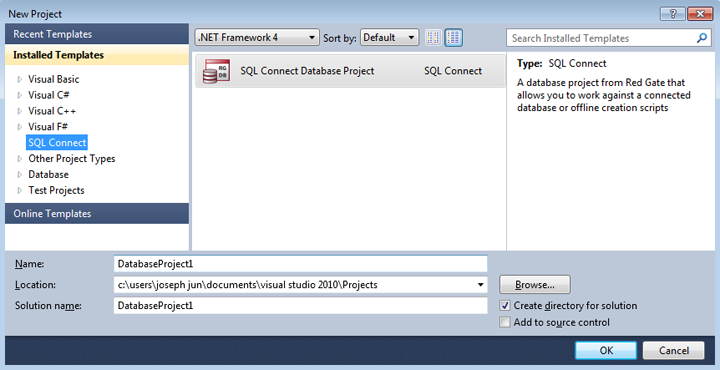
7. Click Create New SQL Connection Project or if you closed the window, you can create a new project and then click the SQL Connect template.

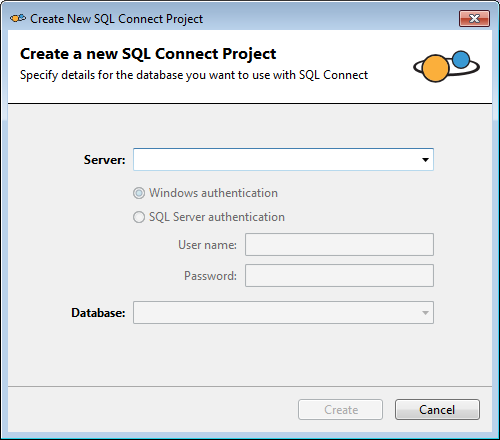
8. After your project is created, you can connect to a database.

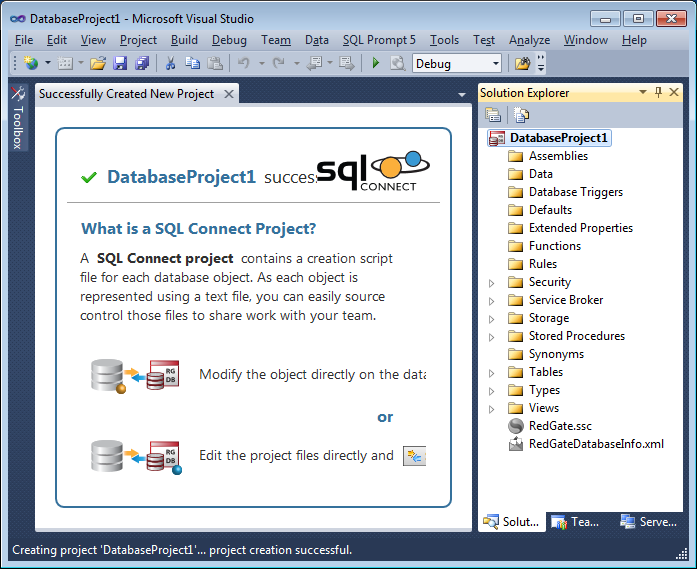
9. After the project is created, you’ll see all of the database-related objects in the Solution Explorer.

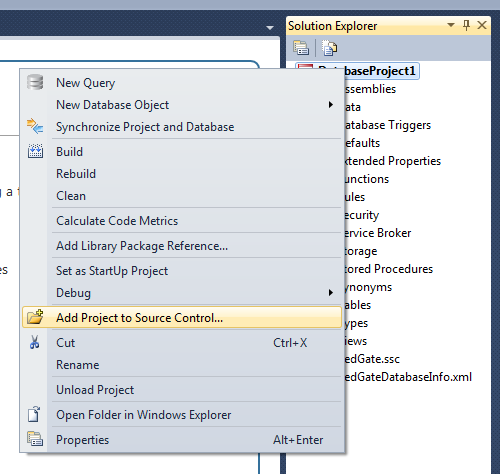
10. From the Solution Explorer window, you can right-click your project and then add it to source control.

11. Select the Team Project and then specify a location.

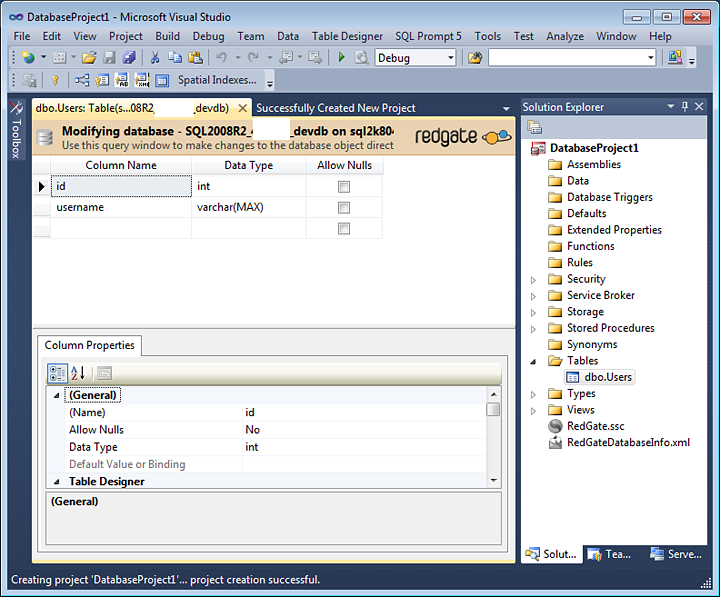
12. As an example, I’ll modify an existing table.

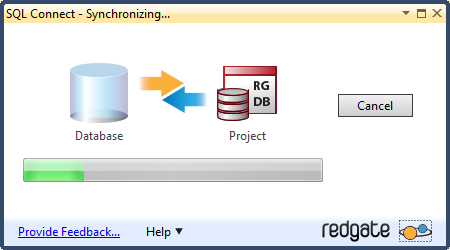
13. Now, all that’s left is to synchronize the change.

SQL Connect allows for much required convenience – something that I always welcome – and it’s definitely worth checking out if you’re not already using SQL Source Control.

For some further information and an instructional video, check out Red Gate’s Getting Started guide on SQL Connect and for updates, you can check their recent changes to SQL Connect.

At the time of this writing, Red Gate is offering DiscountASP.NET users a 20% discount on SQL Connect! Check the Control Panel Marketplace for details.

Now user.ini gives you control over php settings for your site

Michael PhillipsOften someone coming from a *nix/Apache background will ask us why their php.ini files aren’t having any effect on their site. The problem is php.ini doesn’t work on IIS/Windows servers.

But we’ve made a change to the Windows 2008/IIS 7 servers that allows you to upload your own user.ini file, in order to specify php settings for your account.

If you’ve used a php.ini file on a *nix server, this is the same idea. Just create a text file named user.ini in the root of your account. The file can include php settings such as:

display_errors = On
max_execution_time = 500

These settings will be changed for your site only. While most of these settings are safe to change, the user.ini file does give you a lot of control over how php works for your site, so use your best judgement as to what you want to change change.

If you make a change that causes problems with your site, simply remove the line(s) causing trouble and re-upload the file. There is a five minute server cache for user.ini changes, so you may not see your changes until a few minutes after uploading.

Again, this is only for IIS 7 servers. If you are still on IIS 6, you can migrate your site to IIS 7 in Control Panel.